In this post I'll guide you how to make simple project and setup MPLAB IDE environment.
An Introduction to MPLAB:
This introduction takes you through the stages of creating a project and setting up the Integrated Development Environment (IDE) for our ease of use. What you require is that you should download and install the latest version of MPLAB.
Open the MPLAB IDE, which should appear as in Figure. If a blank Output window also opens, close it. The main screen is blank, a part from the Work space window at top left, which can not be closed.

Creating a project:Click the Project button on the tool bar to access the pull-down menu, as shown in Figure.

As you click on project wizard button the following screen will be shown.

Click next and choose a device; click next to continue.

After selecting a microcontroller choose language tool suit. First check "store tool location in project". Click on the desired tool suit. if you didn't found the installed tool check "show all installed tool suit".

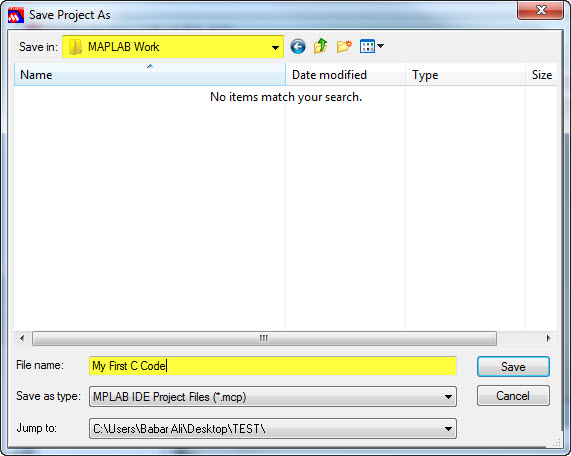
Click next and choose a desired location for file storage click "Browse". Its a good habit that you make a separate folder for your work. Give your project a name. Click "Save". Click "Next".

If you have already some source code already in that folder click those files and click add. Press "Next" to continue. Click "Finish".


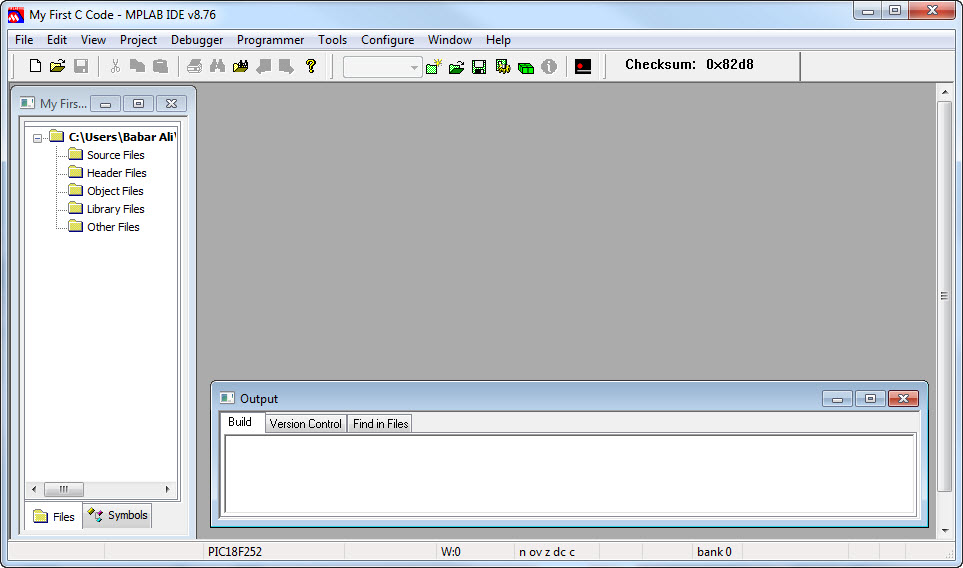
You will now see a blank project is created now.
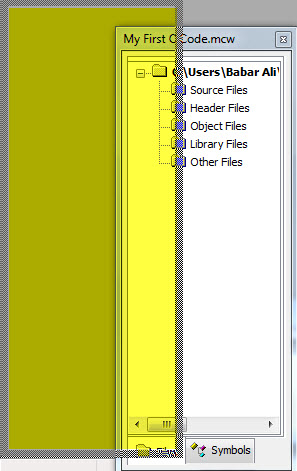
You are now ready to add files to your project. But before adding there are some basic settings that I would suggest. Click on the the project window. Select "Dockable".

After selecting "Dockable" click and hold this window and move to the left or right on the screen. A place comes where this window is automatically adjusted in transparent rectangular block at the corner of screen. I have highlighted this area for visual clarity. Do this for the output window.
Create a new file by clicking File > New. A blank file will appear.

Before writing any code to this new File. I would suggest you to do some basic IDE settings. I am explaining the basics for further study; read the documentation available at www.microchip.com. Right click on the source file and click properties. You are now going to change properties of the editor.

You will see a new window with many options in it. First option is the Tabbed window option. If your project has multiple files checking this option will open any file in a new tabbed window.

The effect of the "Use Tabbed Window" can seen below.

Next window is "File Type". I would like to have line numbers in my program. I also use "Line Wrap" and "Auto Indent" options.

Next to "File Type" Window is "Tool Tips". Here you will use the intelligence of the IDE. Couple of my colleagues said that MPLAB IDE does not have intelligence to show functions and struct members. I always answer them that you have not explored more of this IDE. Here you will set them and enable that intelligence.

Next tab is "Text". Here you can change the font size and the colors for special data types. You are free to choose different font styles and sizes. Just play around and choose what ever style fits to you.

Close MPLAB once to save your settings. As I already wrote that these are the basics settings that I use. For detail information you have to read the MPLAB IDE documentation available at www.microchip.com. Readers comments are always welcomed here. Thanks for reading.
No comments:
Post a Comment